Traditional Kerala Herbal Hair Oil Recipe You Can Make at Home
by Ayurvedic India 06/11/2025
In a world saturated with chemical-laden hair care products, many are turning back to nature. As we scrutinize labels and question ingredients, ancient traditions regain relevance. Among the most revered is Ayurvedic hair oil preparation—an age-old practice rooted in Kerala’s rich, holistic healing heritage.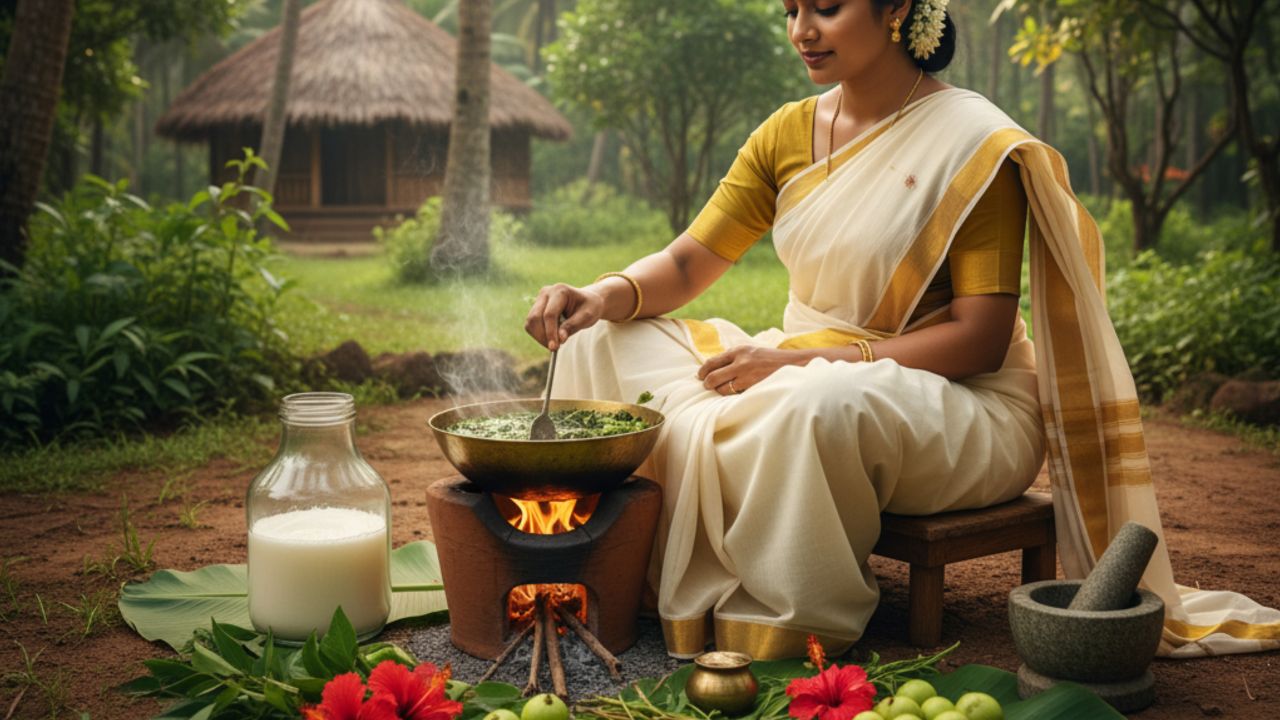 Kerala, the birthplace of authentic Ayurveda, is renowned for its meticulous herbal formulations. Its hair oils aren’t mere cosmetics but therapeutic infusions that nourish the scalp, strengthen roots, and calm the senses. Crafted with precision, they reflect centuries of plant wisdom and holistic self-care rituals.
This guide invites you on a journey through the philosophy and method behind Kerala’s herbal hair oils. You’ll discover a detailed recipe to create your own potent infusion at home and uncover the deep physical and emotional benefits this ancient Ayurvedic tradition continues to offer.
How Ayurveda Explains Healthy Hair
To truly appreciate Kerala’s herbal hair oil, one must first understand the Ayurvedic perspective on hair health. Ayurveda, the 5,000-year-old “science of life,” posits that hair is a byproduct of bone tissue (Asthi Dhatu) and is directly influenced by the health of the body’s tissues and its constitutional energies, or Doshas.
1. Hair and the Doshas:
- Pitta Dosha: Governed by the fire and water elements, Pitta resides in the skin. An aggravated Pitta, caused by excessive heat, stress, or spicy foods, can lead to premature graying, thinning, and hair loss. The cooling herbs in Kerala oils are specifically chosen to pacify Pitta.
- Vata Dosha: Composed of air and space, Vata is responsible for movement. When imbalanced, it can cause dryness, brittleness, split ends, and frizz. The nourishing, unctuous nature of the oil base directly counteracts Vata’s dry, light qualities.
- Kapha Dosha: Earth and water constitute Kapha, which provides structure and lubrication. A balanced Kapha ensures strong, thick hair follicles, while an excess can lead to an oily scalp and congestion, creating an environment for dandruff.
2. The Concept of Sneha Karma (Oleation Therapy)
In Ayurveda, the application of oil is a therapeutic treatment known as Sneha Karma. The oil acts as a vehicle (Anupana), carrying the therapeutic properties of the herbs deep into the tissues of the scalp and the microscopic channels (Srotas) of the body. This process nourishes the hair follicles, strengthens the shaft, and calms the nervous system.
3. The Kerala Method: A Symphony of Slow Infusion
The traditional method of preparation in Kerala is a patient, alchemical process. Oils are cooked over a slow, sustained fire in specific vessels (often brass or clay), allowing for the complete transfer of the herbs’ fat-soluble active constituents into the base oil. This is not a quick maceration but a sacred ritual of extraction, where water content is meticulously driven off, ensuring the longevity and potency of the final infusion.
Basics of Herbal Oil Infusion
This herbal hair oil is technically an herbal-infused oil. While modern methods like solar infusion exist, Kerala’s traditional approach uses gentle, controlled heat. This technique, rooted in the ancient Ayurvedic process called Taila Paka Kalpana, ensures maximum extraction without damaging the herbs’ therapeutic properties.
The process begins by hydrating dried herbs using water. This step reactivates the plant cells, making them more responsive. Once softened, the herbs are blended into a paste and combined with oil. Slow heating then initiates a powerful transformation, allowing their essence to enter the oil.
As the mixture heats, water turns to steam, creating pressure that pushes the herbs’ active compounds, colors, and aromas into the oil. Maintaining low heat is essential—high temperatures can destroy sensitive molecules and burn the herbs, reducing the oil’s benefits and potentially irritating the skin.
Step-by-Step Guide to the Ayurvedic Oil Infusion Method
This guide is designed for the home practitioner, balancing authenticity with practicality.
Phase 1: Gathering Your Ingredients
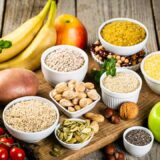
The efficacy of your oil is directly proportional to the quality and intentionality of your ingredients. Source organic, ethically wildcrafted, or high-quality dried herbs wherever possible.
I. The Base Oils: The Foundation of Your Elixir
The choice of base oils is strategic, each serving a unique purpose and balancing the Doshas.
1. Virgin Coconut Oil (12 Tablespoons / ¾ cup): The king of Kerala hair oils. Its molecular structure is small enough to penetrate the hair shaft (porous hair), providing deep conditioning and preventing protein loss. It is inherently cooling, making it perfect for pacifying Pitta, and it possesses natural antimicrobial properties.
2. Sesame Oil (4 Tablespoons / ¼ cup): A revered oil in Ayurveda, Sesame oil is a powerhouse of antioxidants, primarily sesamol and sesamin. It is warming in nature, helps balance Vata, and penetrates deeply into the skin, carrying the herbs with it.
3. Sweet Almond Oil (2 Tablespoons): Rich in Vitamin E, magnesium, and omega-3 fatty acids, Almond oil is an excellent emollient. It adds a silky, smooth texture to the blend, promoting shine and manageability, and is highly nourishing for a dry scalp.
4. Castor Oil (1 Tablespoon): A thick, viscous oil rich in ricinoleic acid. It is a renowned humectant, drawing moisture from the air into the hair. It stimulates blood circulation to the scalp, promoting hair growth, and its anti-inflammatory properties can soothe scalp conditions. Use sparingly as it is potent.
5. Neem Oil (1 Tablespoon): The ultimate detoxifier. Neem’s potent antibacterial, antifungal, and anti-inflammatory properties make it invaluable for treating dandruff, scalp acne, and excess oiliness. Its strong, pungent odor is balanced by the other ingredients.
II. The Aqueous Medium: The Catalyst
1. Pure Water (5 Tablespoons): Use filtered or distilled water. This is the catalyst that initiates the herbal extraction process.
III. The Herbal Powders: The Infusion
These herbs form a synergistic blend that addresses multiple aspects of hair health.
1. Amla Powder (Indian Gooseberry) (1 Tablespoon): The cornerstone of Ayurvedic hair care. Amla is the richest natural source of Vitamin C, a potent antioxidant that strengthens hair follicles, promotes growth, and maintains the hair’s natural pigment, preventing premature graying. It conditions the scalp and adds incredible shine.
2. Fenugreek Seed Powder (Methi) (1 Tablespoon): A treasure trove of proteins and nicotinic acid, Fenugreek is renowned for treating hair fall and dandruff. It helps repair damaged hair follicles and its lecithin content imparts superb strength and shine to the hair shaft.
3. Hibiscus Powder (Dried Leaves & Petals) (1 Tablespoon): Often called “nature’s hair dye,” Hibiscus is rich in flavonoids and amino acids. It nourishes hair, prevents split ends, conditions the scalp, and is known to darken hair naturally while promoting thick, lush growth.
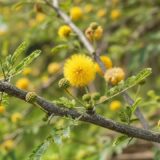
4. Bhangra / Eclipta Alba Powder (False Daisy) (1 Tablespoon): Known as Bhringraj or Kesharaja (“King of Hair”), this herb is legendary. It is a Rasayana (rejuvenator) for the hair, believed to prevent hair loss, combat alopecia, and reverse graying. It nourishes the scalp and strengthens the roots.
5. Brahmi Powder (Bacopa Monnieri) (1 Tablespoon): A premier Medhya Rasayana (brain tonic), Brahmi’s benefits extend to the scalp. It calms the mind, reduces stress-related hair loss, and its cooling properties soothe an inflamed scalp. It strengthens hair roots and promotes growth.
Substitute Note: You may substitute Brahmi with an equal amount of Gotu Kola (Indian Pennywort), which shares similar cognitive and scalp-rejuvenating properties.
Phase 2: The Process – Step-by-Step Preparation
Equipment You Will Need:
- A heavy-bottomed stainless steel or glass pot (Avoid reactive metals like aluminum or copper unless you are an expert).
- A wooden or stainless steel spatula.
- A fine-mesh strainer or several layers of muslin/cheesecloth.
- A funnel.
- Dark-colored glass bottles (amber or cobalt blue) for storage.
Way to Start
1. Blending the Herbs
In a heavy-bottomed pot, combine all your dried herbal powders—Amla, Fenugreek, Hibiscus, Bhangra, and Brahmi. Mix them thoroughly with a spatula, taking a quiet moment to set your intention for healing and nourishment as you blend these gifts from the earth.
2. Hydrating the Blend
In a separate pot, bring some water to a rolling boil. Carefully pour 5 tablespoons of the boiling water over your mixed herbs. You’ll hear a gentle sizzle and notice a rich, earthy aroma. Stir until you get a thick, even paste. Cover the pot and let the mixture rest for about 2 hours. This allows the herbs to fully absorb the water and prepare for the next stage of infusion.
3. Adding the Oils
Once the herbs have hydrated, uncover the pot and slowly pour in your base oils—coconut, sesame, almond, castor, and neem. Stir patiently until the herbal paste is completely coated with oil. It’s normal for the herbs to settle at the bottom as you mix.
4. Gentle Simmering (The Heart of the Process)
Place the pot on your stovetop over the lowest heat possible. This part takes patience. As the mixture warms, you’ll see tiny bubbles forming—this is just the water gently evaporating. Avoid letting it boil; it should only shimmer softly. Let it steep uncovered for 2–3 hours, stirring occasionally to prevent the herbs from sticking or burning.
5. Watching for the Signs
At first, the herbs will soak up some oil. Over time, as the water turns to steam and escapes, the herbs will begin releasing the oil back, now infused with their essence. You’ll know it’s ready when the herbs look crisp and dry. If you notice smoke or hear sizzling, the heat is too high—turn it down immediately.
6. Straining the Oil
When the herbs feel dry and crumbly, turn off the heat and let the oil cool until it’s warm but not hot. Line a strainer with muslin cloth over a clean, dry bowl and pour the oil through it. Gather the cloth’s corners and squeeze out every last drop of infused oil. You can compost the leftover herbs.
7. Purifying the Oil
Pour the strained oil back into a clean pot and gently heat it again on the lowest flame for about 20–30 minutes. This final step removes any remaining moisture, which helps preserve the oil and prevent spoilage. Allow it to cool completely at room temperature.
8. Storing Your Creation
Once the oil is fully cooled, use a funnel to pour it into dark glass bottles—these protect it from light and keep it potent. Label your bottles with the date and store them in a cool, dark place. Properly made, your herbal oil can stay fresh and effective for up to one year.
How and When to Use Your Herbal Elixir
Creating the oil is only half the journey; applying it correctly is the other.
When to Apply:
Ideal Time: As per Ayurveda, the best time for a hair oil massage is at night, about 1-2 hours before you go to bed. This allows the oil to work its magic overnight, deeply nourishing the scalp and hair roots without being immediately exposed to dust and pollution.
Frequency:
- Normal Hair: Once a week is sufficient.
- Dry Hair & Scalp: Twice a week can provide much-needed hydration.
- Oily Hair: Once every two weeks is advisable to avoid over-saturation.
How to Apply (The Right Way)
Preparation: Gently warm a small amount of oil (3-4 tablespoons) by placing the bottle in a bowl of hot water. Never heat Ayurvedic oils directly on a flame or in a microwave, as this can destroy their active properties.
Sectioning: Part your dry hair into multiple sections. This is the most crucial step for ensuring the oil reaches your scalp.
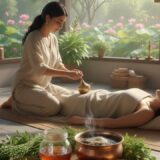
Scalp Focus: Dip your fingertips into the warm oil and begin applying it along the part lines, massaging it into your scalp with your fingertips (not nails). Create a new part and repeat until your entire scalp is coated. Remember, the primary target is the scalp, not the hair length.
The Massage: Using the pads of your fingers, massage your scalp in firm, circular motions for at least 15-20 minutes. This is not a rushed activity. This stimulation dramatically increases blood circulation to the follicles, delivering oxygen and nutrients while facilitating the absorption of the herbal actives.
Hair Length: Once the scalp is thoroughly oiled, you can gently apply the remaining oil to the length of your hair, paying special attention to the ends if they are dry or split.
Rest and Protect: Loosely tie your hair up and cover it with a soft, old towel or a shower cap to protect your bedding. Allow the oil to work overnight.
The Morning Wash: In the morning, apply a mild, natural shampoo to your dry, oily hair before wetting it. This helps emulsify and lift the oil effectively. Rinse with lukewarm water, followed by a cool water rinse to seal the hair cuticles. You may follow with a conditioner if needed, though you may find it unnecessary.
Benefits: What to Expect
Consistent use of this Kerala herbal hair oil infusion offers a symphony of benefits that transcend mere cosmetic improvement:
- Deep Follicle Nourishment: The blend of penetrating oils and nutritive herbs like Amla and Bhangra delivers vital nutrients directly to the hair roots, creating a fertile ground for healthy growth.
- Strengthened Hair Stem: The proteins from Fenugreek and the conditioning properties of the oils fortify the hair shaft from within, reducing breakage, split ends, and porosity.
- Scalp Detoxification and Health: Neem and Brahmi work in tandem to cleanse the scalp of bacteria and fungus, preventing dandruff, itchiness, and folliculitis, while creating a balanced, healthy environment.
- Combats Hair Loss and Thinning: By strengthening roots, improving blood circulation, and addressing underlying Pitta and Vata imbalances, this oil is a powerful ally in reducing hair fall and preventing thinning.
- Delay of Premature Graying: The high antioxidant content, particularly from Amla, helps combat oxidative stress, a primary cause of premature graying, while herbs like Bhangra are traditionally believed to support melanin production.
- Promotion of Dense, Luscious Hair: Regular massage and nourishment can awaken dormant follicles, leading to an increase in hair density and volume over time.
- Neurological Calm: The act of a slow, deliberate scalp massage, especially with nervine herbs like Brahmi, stimulates vital pressure points (Marma points), inducing a state of deep relaxation, reducing stress, and promoting sound sleep.
Advanced Tips and Troubleshooting
- Herbal Variations: As you become more confident, you can experiment. Adding a tablespoon of Liquorice root powder can be excellent for a sensitive, irritated scalp. Brahmi can be amplified with Gotu Kola. Rosemary powder is a wonderful, evidence-based modern addition for growth stimulation.
- The Scent: If the earthy aroma is too strong for you, you can add a few drops of pure essential oils like Lavender, Rosemary, or Ylang-Ylang only after the oil has completely cooled post the final heating.
- Troubleshooting: If your oil develops an off smell or mold, it means moisture was not fully removed. Discard it and ensure a longer final heating time next round. If the herbs burn, the heat was certainly too high.
This oil is not a quick fix but a long-term investment in your holistic well-being. Each strand of hair, nourished by this earthy elixir, becomes a testament to the power of patience, the wisdom of Ayurveda, and the profound beauty of honoring your body with the purest gifts of the earth.


Sunflower and Amla are thought to be the greatest sources of natural conditioners and are the world’s oldest natural hair conditioners. It is the most ancient Indian herbs and still widely used and the most popular home remedies desire by ladies in India.
sunflower oil or seeds ?
For how many months we can store this Ayurvedic hair oil.. kindly reply
Taila or so-called (Ayurvedic Herbal Oils) can last up to 3 years if properly prepared.Beside this some more information
Expiry period of the common Ayurvedic preparations as per AYUSH are
Tablets: 3 years
Powders: 2 years
Decoctions: 2 years
Medicated Ghee: 2 years
Lehyas: 3 years
Oils: 3 years